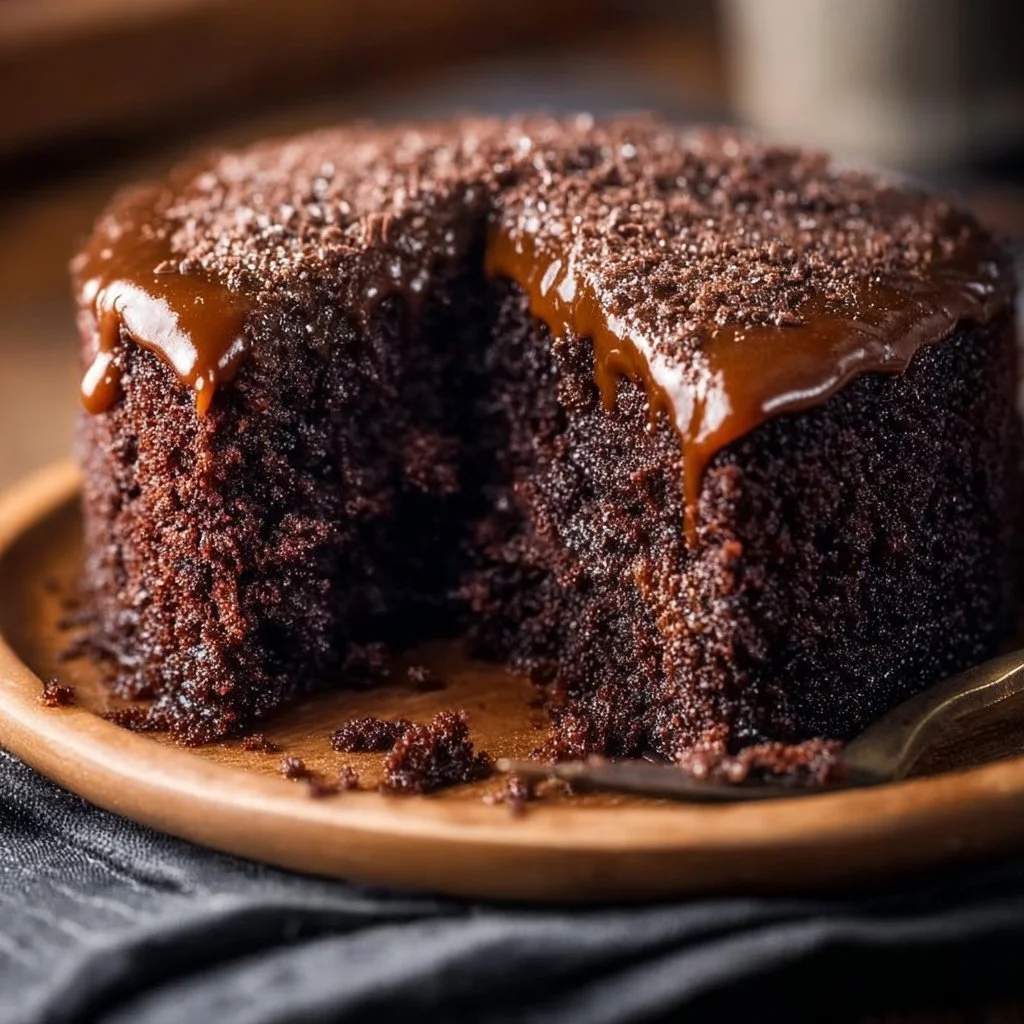
Moist Chocolate Coffee Cake
Moist Chocolate Coffee Cake
Ever taken a bite of something so rich and chocolatey that it practically melts in your mouth? Enter this Moist Chocolate Coffee Cake! With the perfect blend of coffee and chocolate, this cake is about to become your go-to dessert for any occasion. Whether you’re indulging in a quiet evening at home or impressing guests, this one-pan wonder is easy, quick, and oh-so-delicious. 🎉
Why Make This Recipe
Here’s why you’ll want to whip up this cake today:
- Simplicity at its Finest: No complicated steps or fancy equipment needed. Just mix, pour, and bake! Who doesn’t love a no-fuss dessert?
- Budget-Friendly: Using everyday ingredients means you won’t break the bank to treat yourself. Wallets rejoice!
- Family Favorite: With its rich flavor, everyone—kids and adults alike—will be reaching for seconds (or thirds). Bet you can’t eat just one slice. 😉
Ingredients
You don’t need fancy stuff — just these basics!
- 1 ¾ cups all-purpose flour
- 1 ½ cups granulated sugar
- ¾ cup unsweetened cocoa powder
- 1 ½ teaspoons baking powder
- 1 teaspoon baking soda
- ½ teaspoon salt
- 2 large eggs
- 1 cup brewed coffee
- ½ cup vegetable oil
- 1 teaspoon vanilla extract
Directions
- Preheat the oven to 350°F (175°C) and grease a 9×13 inch baking pan.
- In a large bowl, combine the flour, sugar, cocoa powder, baking powder, baking soda, and salt.
- In another bowl, whisk together the eggs, coffee, vegetable oil, and vanilla extract.
- Pour the wet mix into the dry ingredients and mix until just combined.
- Pour the batter into the prepared baking pan and smooth the top.
- Bake for 30-35 minutes, or until a toothpick inserted into the center comes out clean.
- Allow to cool before serving. Enjoy your chocolate coffee cake!
How to Make Moist Chocolate Coffee Cake (Overview)
Making this cake is as easy as pie—er, cake! Start by preheating your oven and greasing your pan. Mix together the dry and wet ingredients in separate bowls, then combine them. Remember, don’t overmix; we want a soft cake, not a rubbery disaster. Pour it into the pan, pop it in the oven, and let the aroma take over your kitchen. Pro tip: it’s okay if it’s hard to resist the smell while it bakes!
How to Serve Moist Chocolate Coffee Cake
Serving it warm straight from the oven is blissful. Top it with a scoop of vanilla ice cream or a drizzle of chocolate ganache for an added treat. Imagine the rich chocolate contrasting with the cool creaminess of ice cream—heavenly! For a little crunch, sprinkle some chopped nuts on top or serve with fresh berries for a pop of color and freshness.
How to Store Moist Chocolate Coffee Cake
This delightful cake lasts about 3-5 days in the fridge. Store it in an airtight container, and don’t worry—it stays moist and delicious! If you want to keep it longer, pop it in the freezer for up to 3 months. Just wrap it well in plastic wrap and foil. When you’re ready, let it thaw in the fridge overnight, then warm it up in the oven for that fresh-baked taste again.
Tips to Make Moist Chocolate Coffee Cake
- Use Fresh Coffee: Brewed coffee adds depth of flavor. If you want a caffeine kick, use espresso.
- Room Temperature Ingredients: Make sure your eggs and other ingredients are at room temperature for better mixing.
- Don’t Overmix: Just mix until the ingredients are combined. Overmixing can lead to a dense cake.
- Add Chocolate Chips: Want to up the chocolate factor? Fold in some chocolate chips right before pouring the batter into the pan.
- Test with a Toothpick: Always test for doneness by inserting a toothpick. A few crumbs are okay, but it shouldn’t be wet.
Variation
Feel like switching it up? Substitute half the flour with whole wheat flour for a healthier twist. You could also try adding a touch of mint extract or even a swirl of peanut butter for a flavor explosion. Need it to be vegan? Swap eggs for flax eggs and use a plant-based milk instead of coffee. 🌱
FAQs
Can I use decaf coffee in this recipe?
Absolutely! Decaf coffee will work just as well, so you can enjoy your cake without the jitters.
Can I make this cake ahead of time?
Yes! This cake stores well, and you can easily make it a day or two in advance. Just keep it covered until you’re ready to serve.
Can I freeze the cake?
You sure can! Just wrap it tightly in plastic wrap and foil, and it’ll be good for about three months in the freezer.
📌 Pin this recipe for your next cozy dinner night!

Moist Chocolate Coffee Cake
Ingredients
Method
- Preheat the oven to 350°F (175°C) and grease a 9x13 inch baking pan.
- In a large bowl, combine the flour, sugar, cocoa powder, baking powder, baking soda, and salt.
- In another bowl, whisk together the eggs, coffee, vegetable oil, and vanilla extract.
- Pour the wet mix into the dry ingredients and mix until just combined.
- Pour the batter into the prepared baking pan and smooth the top.
- Bake for 30-35 minutes, or until a toothpick inserted into the center comes out clean.
- Allow to cool before serving.